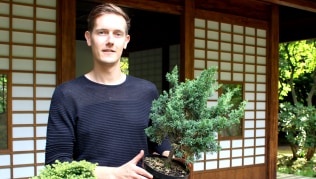
In May of 2004 I visited David Fukumoto at his Kurtistown, Hawaii, nursery, Fuku-Bonsai. David is a long-time friend and Bonsai artist and knowing of my interest in Ficus presented me with a Ficus natalensis, grown from material that he obtained many years before while involved in a research project with the Lyon Arboretum.
For some years David had the tree growing in an ultra deep container to help it develop large and long roots which hopefully would become the focus for the tree’s design. David has a fabulous specimen from this same material in the National Bonsai and Penjing collection in Washington DC. David and I regard this material as one of the top Bonsai Ficus varieties to use for Bonsai due to its vigor and incredibly powerful and aggressive root development. The exact name of this species of Ficus is in question at this time.


Left: JM with Ficus in growing container, 2004.
Right: Tree in an extra deep container to develop long, large roots, 2004
While at the nursery David, Mike Imaino (senior plant manager and President of the Mid-Pacific Bonsai Association) and I removed the tree from its container, bare-rooted it and sawed apart the single tree to become three separate plants each with its own root system. When we were done there were literally no leaves or significant branches remaining. The aggressive nature of this fig and its vigorous root system allowed this to be done in one stage. With weaker materials such drastic steps would need to be accomplished over several years and require several repottings.


Left: Mike Imaino and JM sawing the tree into pieces, 2004
Right: Mike holding up plant two on the left and I am holding plant one on the right, 2004
The bare-rooted plants were shipped directly to my home in Montana and upon arrival they were immediately potted into deep containers with the pot depth increased with aluminum foil collars. Inside the foil, a very coarse soil and sphagnum moss were added to encourage vigorous rooting and allowed unrestrained growth.

Plants in my home in Montana planted into deep containers, 2004
Very quickly the trees began growing new leaves and adapted easily to my growing room and the metal halide artificial lights. All my tropical plants are grown in a plant room under artificial light and rarely spend time outdoors in the natural sunlight. While the initial work in Hawaii separated the tree into three large plants a fourth plant was removed from the top of plant 1 about a year later, while the fifth plant was developed from a root cutting.
All the plants were allowed rampant top growth for a year or two with no cutting back or trimming. Retaining all the growth allowed the trees to gain vigor, and to produce a multitude of branches from which to select the final design. Additional root elongation and bulking up was also stimulated by the strong top growth.
After the initial few wild growth years the plants were periodically cut back; keeping branches that might be useful in the final design while ruthlessly removing branches that did not work. After the designs began to take shape and the primary branches were selected the plants were potted into smaller containers. Wiring was used as needed to shape the branches but much of the shaping was performed by clip and grow techniques ( Clip and grow involves trimming back branches and sub-branches keeping only those that grow in the proper direction).
As the design process came further along defoliation was periodically performed to force more dense branching. Defoliation applied in the earlier developmental steps is often not helpful as it restrains growth and weakens the tree. Defoliation is more useful in the final stages when smaller leaves show the trees in a more suitable scale as well as developing more ramification and finer branches.
Read more on specific guidelines for Ficus Bonsai care.
Next I show five progressions from the Ficus trees:
Progression 1 (Ficus with air roots)


Left: Tree 1 and Tree 4 at the top , 2004
Right: Tree 1 allowed rampant growth 2005

Tree 1, severely reduced, 2006

Tree 1 just prior to exhibit in the 2nd National US Bonsai Exhibition, 2009
This Bonsai plant developed the fastest of all the sections, probably due its being the largest piece at the start. Its very significant rootage was put to use in the creation of an exposed root or epiphytic, rotted-out trunk style. This plant was far enough along in its development to be invited and displayed in the second annual US National Bonsai Exhibition in 2010 at Rochester New York. Since then I became interested in shortening the top of the tree to make it more compact. The entire top of the tree was removed in February of 2011. Leaving one small branch to become the new apex. This was allowed wild growth and trimmed back several times to create taper. The heavy right lowest branch was shortened back as well late in 2012.

Apex of the tree and the original right side branch removed, 2011

Virtual depicting the Ficus' future progression
Progression 2 (Ficus in Semi cascade and with air roots)
The second largest piece of the original tree had really lovely curves and prominent roots.


Left: Tree 2 in rampant growth phase, 2006
Right: Tree 2 reduced back to basic structure, 2006 (showing the back of the tree)

Tree 2, defoliated and showing branch structure developing and a long primary branch, 2010
The tree was tipped over with each repotting to emphasize the movement and developed into a dramatic semi-cascade style. In development the main branch was shortened from a focal point in order to bring the emphasis back to the awesome roots and not so much to the semi-cascade type movement. It is progressing along quite well and could be exhibited one day in the near future.

Later in 2010, tree tipped clockwise with long branch trimmed back
Progression 3 (Ficus on rock)


Left: Tree in free growth phase, 2005
Right: Tree 3, reduced and secured to a stone, 2005

Rock placed horizontally, 2010

Rock tipped vertically for added dramatic effect, 2013
This piece was developed from a chunky, blunt piece of the original plant. Frankly it was quite ugly and it was nearly discarded at the start. Using some inspiration and a lot of desperation the piece was affixed to some wonderful textured rock and allowed to grow strongly to encourage the roots to grasp the stone. Initially the stone was kept flat on the soil but more recently lifted up to form a more vertical and dramatic presentation. Final branch selection still needs to be done. An additional rock was added to the base in 2013. This root-over-rock design has a long way to go to its final evolution.
Progression 4 (Semi-cascade style with aerial roots)
This segment started as a leafless, branchless upright section with one or two aerial roots that was removed from the top of Plant 1(see above). It is now on the way to becoming a semi-cascade style replete with aerial roots.

Tree 4, semi-cascade, 2012
Now that the basic shape has been set additional secondary branching is being developed by repeated pinching out of the growing tips and twice yearly defoliation.
Progression 5 (Ficus in Cascade style)
This plant was a piece of aerial root removed from the original plant. Its root end was planted into soil while the cut end sprouted leaves. The plant is now on the way to becoming a unique cascade style. While not all Ficus will sprout from root cuttings this species is one that sprouts easily from larger pieces of root or branch cuttings.

Tree 5, root cutting, 2009
Conclusion
The vigorous nature of this Ficus allowed for an initial aggressive splitting of one tree into three smaller plants. Two additional trees were developed; one, from an aerial root and a second from a large root cutting.
An initial period of rampant re-growth was allowed, followed by primary branch selection and removal of un-needed branches. Over time these retained branches were repetitively grown long and then reduced to finer sub-branches to produce taper and secondary branching. In later stages defoliation was performed once or twice yearly to develop finer branches and ultimately smaller leaves.
Tree 1 has matured into an elegant advanced stage epiphytic design.
Tree 2 is a handsome semi-cascade tree that is close to completion.
Tree 3, the root-over-rock styled plant, will take more time to complete its branch growth and styling. I am still not sure that it will make a good Bonsai.
Tree 4 is a nicely shaped and attractive semi-cascade Bonsai.
Tree 5 is nearly done and ready to be admired. Some more refinement will make it even more attractive.
By splitting apart the starting material, allowing aggressive growth and then applying sound horticultural and Bonsai techniques five quite unique Bonsai are being developed from one tree.
Written by: Jerry Meislik (copyright of the text and all images belongs to Jerry Meislik). "My interest in Bonsai began as a teenager when I visited the Bonsai exhibit at the Brooklyn Botanical Gardens. In 1977 while living in Florida my interest was re-kindled after seeing some Ficus Bonsai. Since then I have been actively studying trees and how to grow them in containers and creating Bonsai.". Please visit his website bonsaihunk.us for more information or check his Bonsai artist profile; Jerry Meislik!