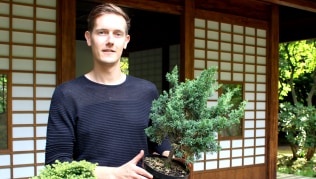
Jérôme Hay invited readers to follow his shaping of an azalea, starting with a classic 2-to-3-year-old seedling. After preparatory work last April, these Japanese azalea plants are ready to begin being shaped into future bonsai.
Now that the Satsuki azalea bonsai have started to take shape, we need to discern their essential characteristics in order to press ahead. Giving form to a living thing can be trickier than modeling clay, as the plant has its own say. Let us consider this active response as an advantage rather than a drawback. Creating a Bonsai is always a challenge, especially when starting off with a fresh young plant. This kind of plant lets us experiment with the art of Bonsai. But to begin, we need that spark of inspiration. The initial stage of this project for six Japanese satsuki azaleas can be carried out up to early June, after blossoming. Following a few tentative weeks of spring, the warm temperatures of early summer have caused an explosion of growth.

The azaleas’ evolution
During this intermediate phase, little has been done to the plants other than watering, weeding and adding fertilizer (Osmocote – a slow-release type). It is now three months since our first efforts at shaping, and we can observe the different reactions of the six plants. Some display abundant growth, others less so. If the same cultivation method has been used for all of them, the differences between them must be linked to the variety. If this is not the case, there must be an underlying problem – most likely a disease or insects.
Since April, the foliage has more than doubled in density, and shoots have sprouted all over the place. This allows us to continue our work.
It is now easier for us to protect the future Bonsai. Their initial forms are fixed, leading us on to the next stages.

Removing the wiring
Our first job is to remove the wiring – which is no mean task. Here and there the wire has gone into the wood, and nimble fingers are needed to release it. At this stage, the fact that the wire has marked the wood is nothing to worry about, since the plant will continue to grow and the wounds will heal. I would even go so far as to say that it helps shape the trunk, for a tree’s character is born of its imperfections. The most difficult task is to remove the wiring that is under the surface of the substrate – the kanuma.

Encouraging new roots
Through removal of the wire that kept the horizontal branches in contact with the moss and kanuma, small roots have appeared. These are important assets, as this is how thick, widely spread nebari are formed. To help this process to continue, I add a layer of kanuma to the pot’s surface. Its level has dropped due to watering and weeding, and bringing it up again will allow the roots to develop and to continue this natural layering process. Don’t forget to spread a fine layer of moss across the surface: it will help maintain a constant, healthy level of moisture.


No swelling
Azaleas have a very fine and reactive cambium, which will try to cover the training wire. In other species, such as conifers, it would have formed a swelling on both sides of the wire, and would have ended up swallowing it. In azaleas, the fine layer of cells moves over the wire and covers it. It is important to be aware of this at the pruning stage, since the tools used for cutting branches are not the same. Concave branch cutters are to be avoided, as they scoop out the wood; this does not harm the azalea’s healing process, but it leaves an ugly mark, exposing the section that has been hollowed out by the cut.
Cutting and pruning
It is now time to cut away any superfluous or poorly positioned branches and to balance up the future Bonsai. while temporarily leaving some others as sacrifice branches to make the trunks grow thicker.
At this stage, we can already start to decide which side of the tree might be the front. This will help us with cutting and pruning, as we will remove the branches that protrude forwards and start to determine which ones will become major branches. Those that are retained should not be cut back, as this would reduce their vitality – that is, their speed of growth – and we want to allow them to continue to grow and thicken. Trimming the extremities of a branch can slow down the plant’s activity: a few weeks from autumn, this would delay the plant’s response until the next growing season. In total, I have removed half of the foliage’s density, or perhaps a little more, but that is the maximum that should be done. Azaleas should not be pruned during the dormant season of winter, when their lack of ability to heal would inevitably cause them to be contaminated by disease. This last cutting of the year will allow the plant the time to heal and to prepare for winter.
I cut out the trunks that are too close together, and I try to ensure that the remaining trunks are spaced at equal distances: this will allow me to give them more homogeneous forms during wire training.
I prune back all the branches on the trunks as soon as they reach a diameter of 1/4" (6mm), so that they thicken up; I leave the smaller ones as sacrifice branches. Even if some of the branches are well positioned and could be interesting for structuring the Bonsai. I still remove them without hesitation: I am not yet at the stage of selecting and constructing branches, and if I keep these, it will be to the detriment of the fundamental structure.


Azaleas tend to sprout in the form of a crown: several shoots emerge from the same point. Trying to form a fairly long trunk, only the longest shoot is kept. If this had been done from the beginning, when the plant first sprouted, the sprigs would have been even longer and thicker, as the ones being removed here represent wasted material.

The second shaping
Shaping needs to be an on-going process. Through regular intervention, the plant can be formed without major effort, and any errors can be corrected without having to go back to square one. I wire the young shoots almost without protection: they are very flexible, allowing me to position them where I want. This process should be creative, and not rigid, as we still have a long way to go before the plant is a Bonsai. I wire the best-placed trunks all the way along. Even if they seem oversized, this allows me to create movement without them branching off, as we are not yet at that stage. The forms should be sinuous and irregular throughout, with a unity between the different trunks, as this will be useful when the tree is balanced out during its final shaping. We are now getting ahead for the next stage of work, as it is easier to shorten a trunk by cutting it down than to wait for it to grow. The overall form should be open. In nature, trees sprout wherever the seed has fallen. The race for sunlight pushes the plants to spread out, so as to take full advantage of the light available. From this point, the previously confined group of trees take on a broad form.


The end of the wire that will be used to train the future trunk is bent to form a fastening that will anchor the branches to the substrate.

Monitoring progress
As a general rule, azaleas should not be worked on over the winter period. We must wait patiently for late March or early April before seeing a reaction, and we will not intervene again until mid-June. During the winter, it is, however, necessary to water the plants lightly, treat them with Aliette and display them in a sunny, sheltered position. This will allow them to keep the maximum amount of foliage and will set them up for a more energetic start to the growing season in the spring.
Watch out for Phytophthora
One of the plants does not appear here. I cut back this plant so severely that it suffered stress and stopped functioning for a period of several weeks. With its immune system undermined, it was contaminated by a fungus – Phytophthora. The infection spread through the whole plant, and killed it. This fungus is very well known in the cultivation of plants from the Ericaceae family. It stealthily attacks their collar or roots, cutting off the supply of sap to the parts above ground. By the time its effects are visible, it is already too late. It is always fatal for young plants, and is damaging for larger trees.
There are ways to avoid falling foul of this nasty organism, but they are only in the form of preventative measures. The following few simple rules are valid for the prevention of a large number of diseases, and have proved highly effective:
- Disinfect tools with 90° alcohol after cutting or pruning each tree, to avoid transmitting fungus spores.
- Isolate plants if you suspect that they are infected.
- Clean plants regularly. The disease spreads through contaminated material: dead leaves and twigs. It is imperative to burn the latter. Never put them in compost, as this can create a source of infection.
- Allow plants to dry between waterings. The substrate must be able to breathe. Plants drink and breathe through their roots: when the substrate is waterlogged, the roots suffocate.
- Treat plants regularly and systematically with Aliette (fosetyl-aluminium). This product disinfects the plant from any pathogenic fungus spores, without affecting mycorrhizas. It is easy to apply, and is suitable for use in organic agriculture.
Government legislation often leaves little choice of active ingredients that are effective against this disease. Beware also of other funguses such as Verticillium and Rhizoctonia, which cause more or less the same symptoms as Phytophthora. This article was contributed by Esprit Bonsai Magazine.