What is a Bonsai stand or "dai" to the enthusiast? When a Bonsai artist is going to show a tree, it needs to be presented on a stand.
The stand is like a "frame" for the tree as a frame is for a picture. It completes the presentation of the tree to the viewer. More "feminine" trees require a more delicate stand while a bolder tree requires a bolder or more elaborate stand. The flow and balance between the two is very important.
As a stand maker, I also have deeper feelings about this. I see the tree as the "thoughts" of the caretaker of it. It is this person that has shaped and made decisions about the tree and nurtured it with their own creativity. My part in this is to make sure that I collaborate with the Bonsai artist with my art to complete the presentation that they have envisioned in their mind as to how the viewer will see it. The stand is an elevation or platform to "raise up" the thought or meditation of the artist. This is the main goal for all of the hard work to care for and cultivate the tree.
So many times, when a viewer approaches a displayed tree, the first reaction is to criticize rather than to appreciate the full physical and emotional peacefulness of it. My hope is that I help the owner of the tree to accomplish this.To project a deeper connection between the tree and the viewer. That is why I like to discuss and design new ideas with the Bonsai artist about making a stand for their tree as opposed to them just picking a stand out of what I have in stock. This is why I have made many different styles of stands and use different variety of woods and dyes.
How to create a Bonsai display / Bonsai stand
This is the construction of one of my most popular stands that I make. It is a platform style with fragile design on the sides to give it that artistic feel. There are many versions I make of this stand. I like to change the detail on the sides as you can see in the gallery of my stands at my website (see link at the bottom of this article).
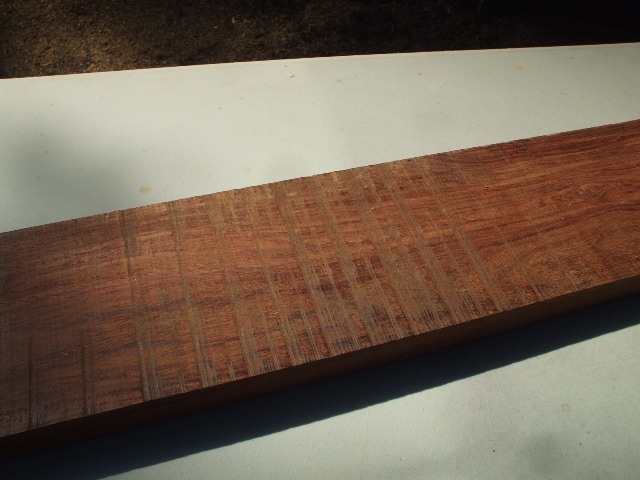
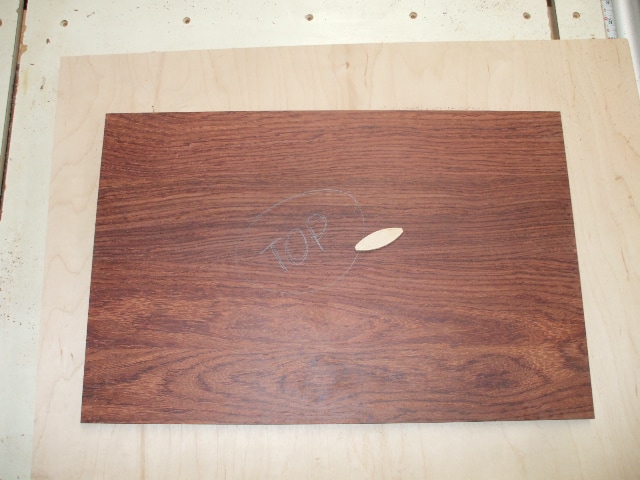
#1 - This is the rough board of Indian Rosewood that I start with straight from the lumber yard. It will be cut on the table saw and ran through my planer to specific thickness and size.
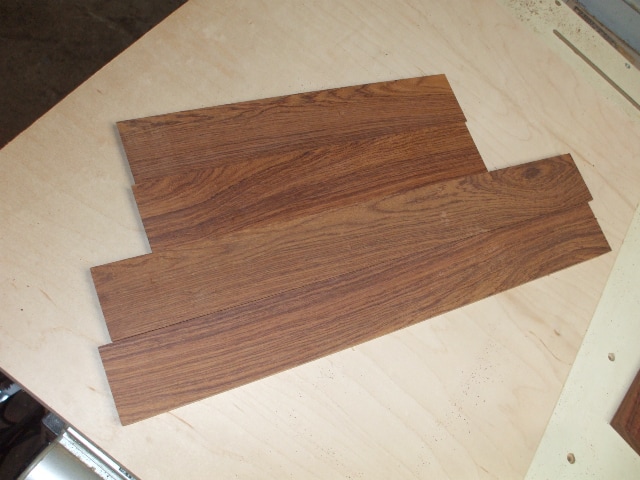
#2 - This is the center of the stand all glued up and cut to size. The small football shaped piece of wood on top is called a "biscuit". It is like a flat dowel that is used to join the wood to keep it from separating over time. There is a slot cut in both pieces of wood to be joined and the biscuit is glued into the slots when the boards are glued together. This ensures a very high strength joint.
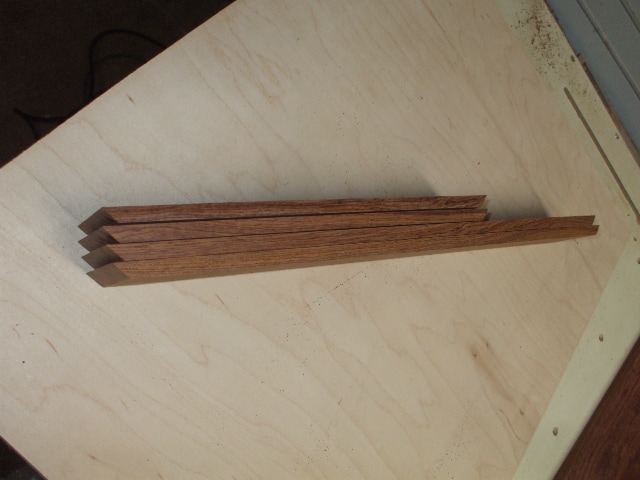
#3 - In this photo are the edges or sides of the stand after they have been cut to size and mitered at the ends which will be the corners of the stand.
#4 - Showing the grain of the sides. The sides for this stand must be completely cut out and sanded BEFORE the stand is all glued together. It would be very hard to sand them after being attached to the top.
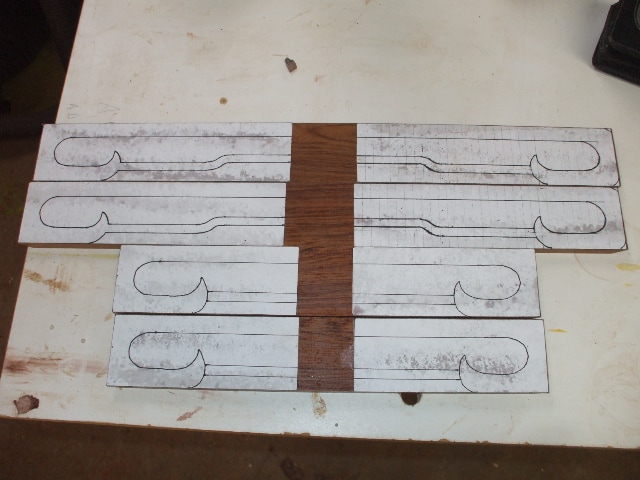
#5 - This photo shows the sides with the templates attached to the wood with the lines I will follow when cutting out on my scroll saw. I draw these out on graph paper for each stand and different design and different size. I apply clear tape to the wood and spray glue the paper drawings to the tape. This eliminates getting the spray glue directly on the wood and makes removing the "stencils" from the wood easy.
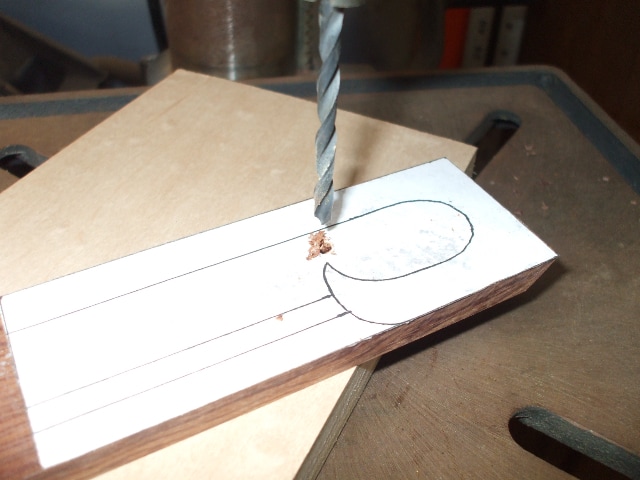
#6 - First, you must drill a hole in each of the areas to cut out to put the scroll saw blade through.
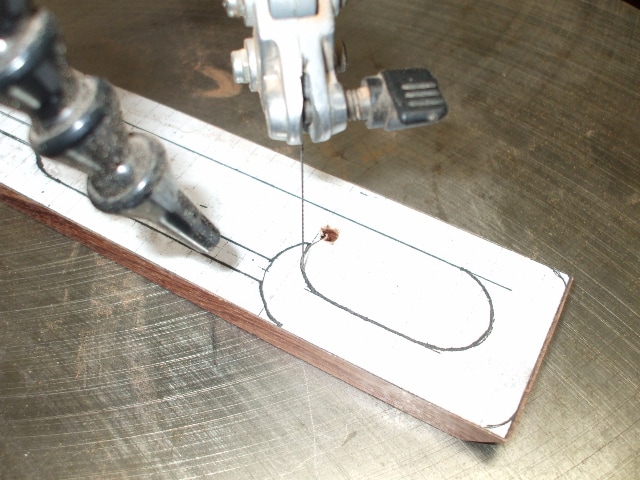
#7 - Showing the scroll saw cutting the wood to the lines. Each cut out requires detaching and re-attaching the blade. You can see the blower nozzle which keeps the sawdust out of the way.
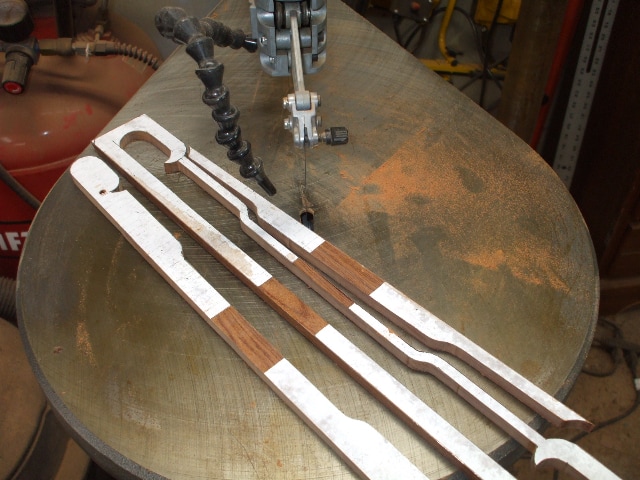
#8 - Showing the side cut out and the pieces that came out of one side.
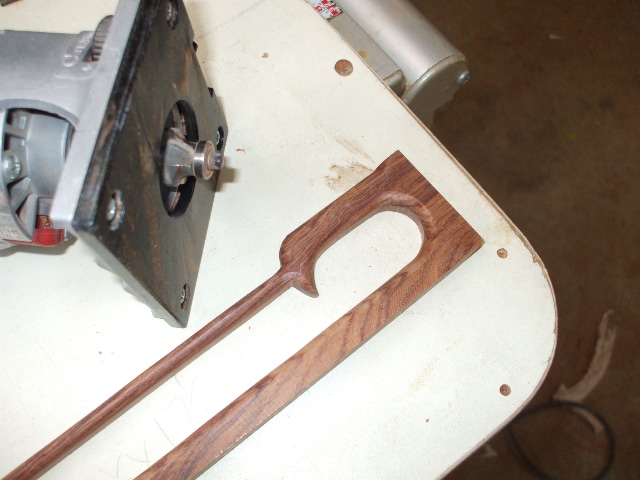
#9 - Next step is to use a router to round the edges of the cut out area.
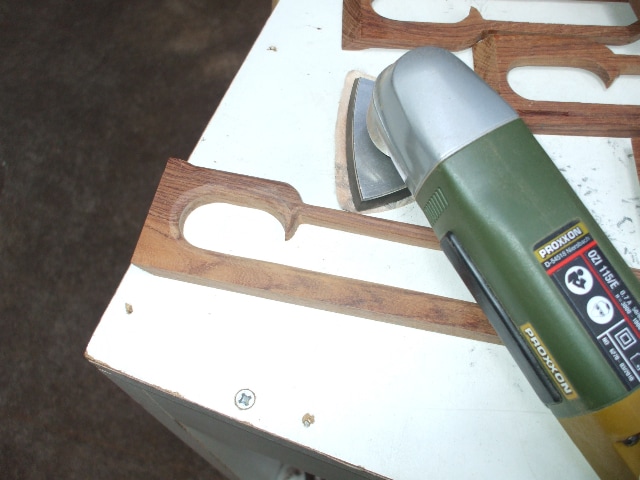
#10 - Of course, sanding, sanding, sanding! This is the sander I use to sand the tight areas on the sides.
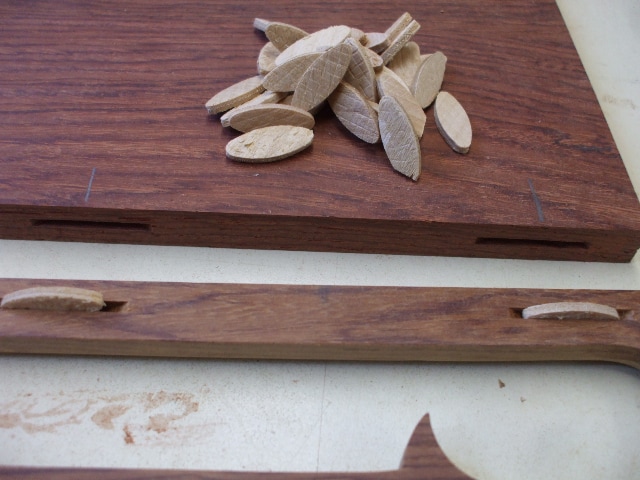
#11 - Showing how I attach the sides with very small biscuits, again, this is to ensure strength of stand construction.
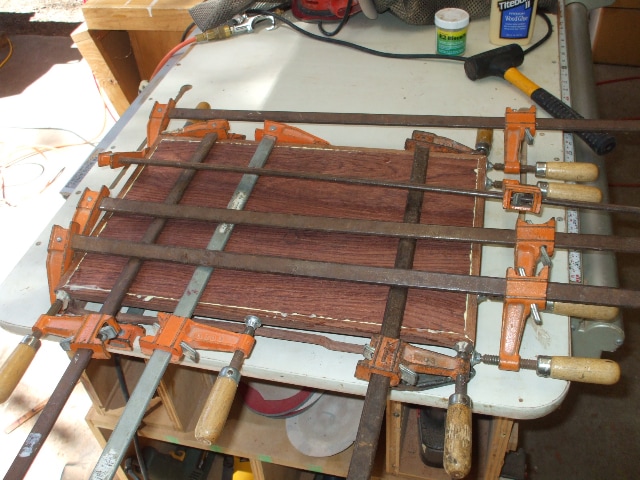
#12 - It takes many clamps to glue together the stand!
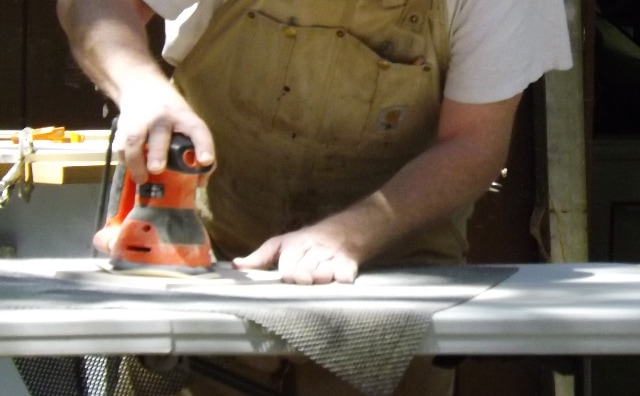
#13 - This is the orbital sander I use to sand my stands with. I use it on the flat areas.
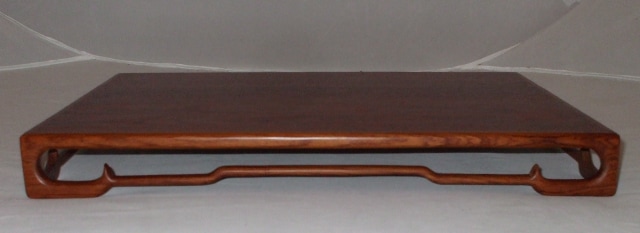
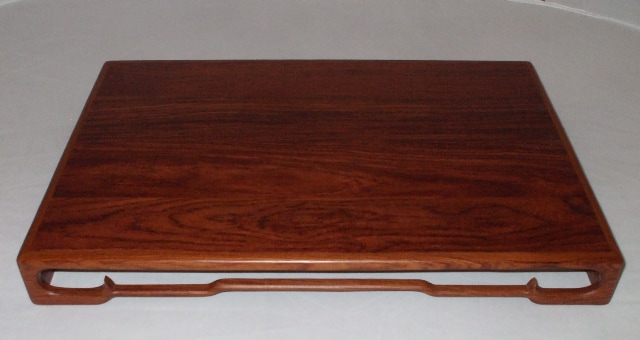
#14 & 15 - The finished stand after it has been spray with sanding sealer, satin lacquer and rubbed with a quality furniture wax.
This rosewood is very beautiful and rewarding to work with. The density of the wood holds up well to handling without breaking and the tight grain is pleasing to the eye.
Written by: Jerry Braswell. "I have been a woodworker since 1983. After an encounter with a Suiseki enthusiast, I was asked to make daizas for him and have made over 500 daizas since for friends and clients. About three years ago I was asked to start making Bonsai stands because of the need within the Bonsai community for good quality custom sized stands. These are available for purchase on order, see my website". Please visit his site artofthedaiza.wordpress.com for more information, or read more about Arts related to Bonsai.