After thirty years working with Bonsai I decided enough was enough – I needed a decent bench to display my ever growing collection of Bonsai. It took me a further three years to finally get round to actually building it.
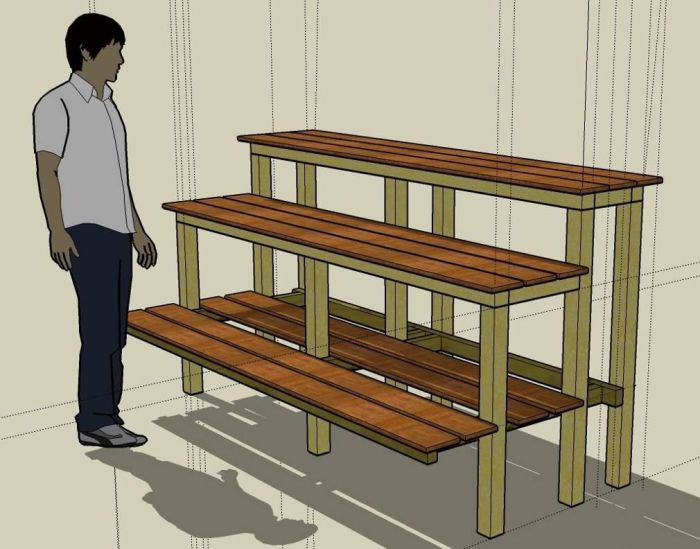
It's the first large woodworking project I've ever undertaken which didn't originate from an Ikea flat-pack - and I'm really happy how well it turned out. The basic design is built around the use of “standard” sized hardwood decking planks supported by a simple frame of treated pine. The deck planks are 7’ x 5.5” x ¾” (215cm x 14cm x 2cm). The rest of the framework is essentially sized around these dimensions. If you have different wood sizes you would need to design the overall sizes around your standard component dimensions.
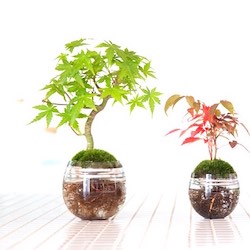
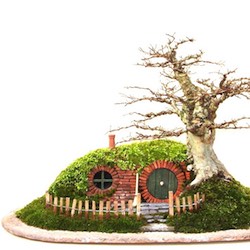
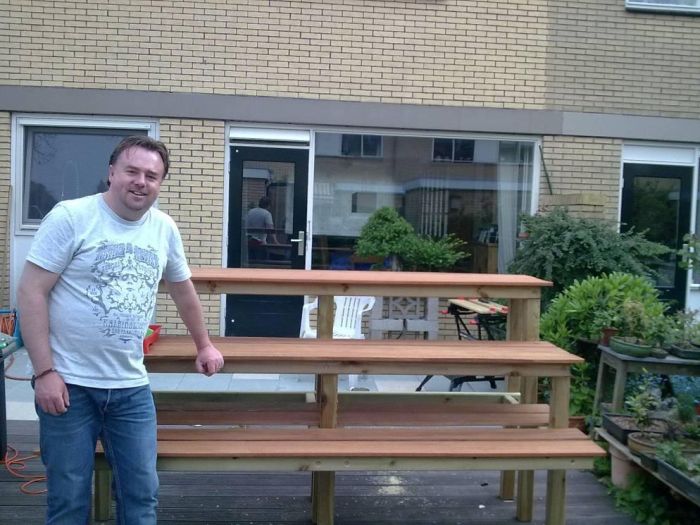
The finished Bonsai table
Video of building a Bonsai table
The video below shows how Oscar (Bonsai Empire) build another Bonsai table, which might be an interesting watch as well.
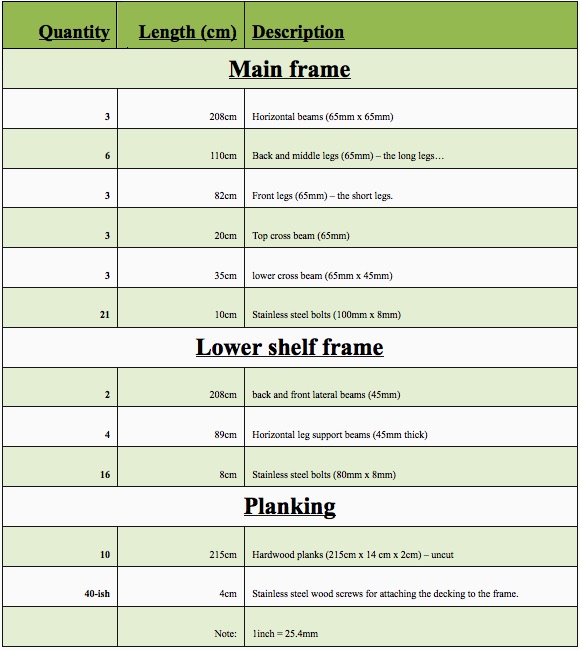
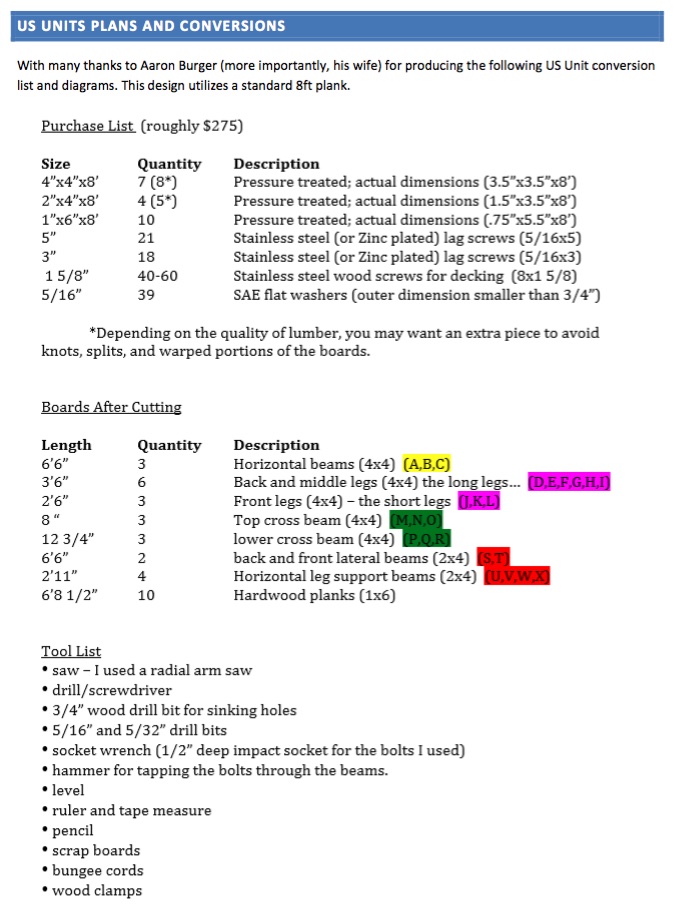
Component list
All the wood used for the frame is treated pine. There are two sizes used – 65mm square and 65mm x 48mm. The planks used for the shelves are hardwood decking (Bankirai). For US unites, see below.
Additionally the following tools are used
- A saw – unless the wood is pre-cut. E.g. I used an electric circular saw.
- An electric drill
- A 22mm blade bit for sinking bolt holes
- An 8mm drill bit for pre-drilling bolt holes. Needs to be same as bolt diameter.
- A ratchet wrench (11mm socket for the bolts I used)
- A hammer for tapping the bolts through the beams.
- A workmate© for holding the wood when sawing/drilling and during the frame assembly
- A set square
- A spirit level
- An electric screwdriver
US Units
Bonai bench assembly walkthrough
The assembly sequence is as follows:


Construction Walkthrough
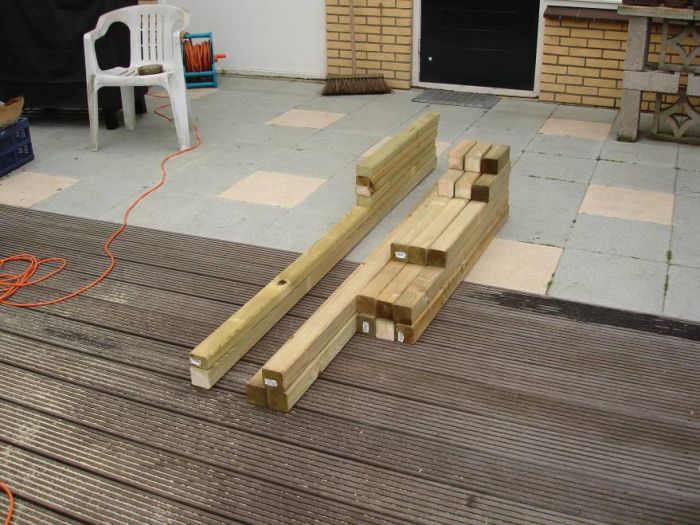
Cut the wood. All joints are 90 degrees.
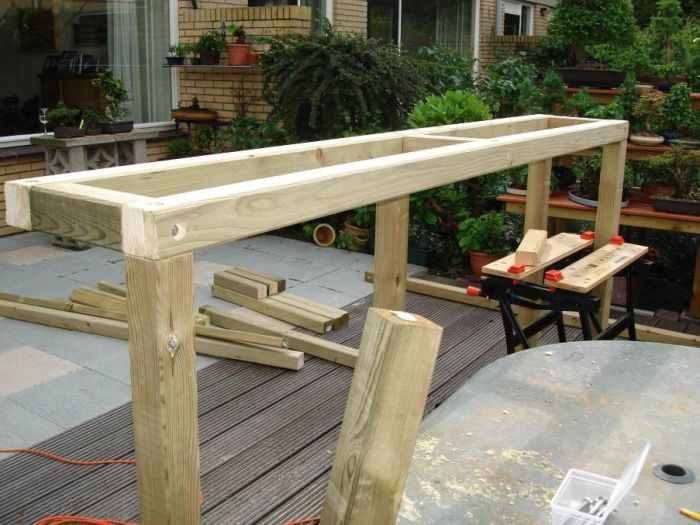
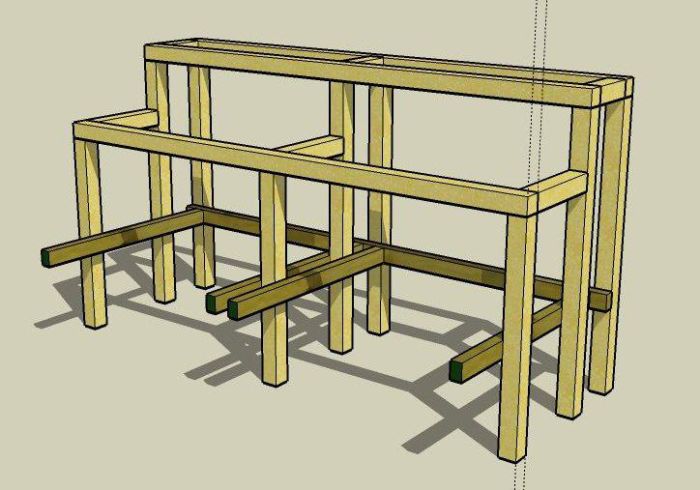
1. Assemble the top-most frame element from 2 x 208cm beams and 3x 20cm pieces.
- Start with the two end support and then put the centre piece in.
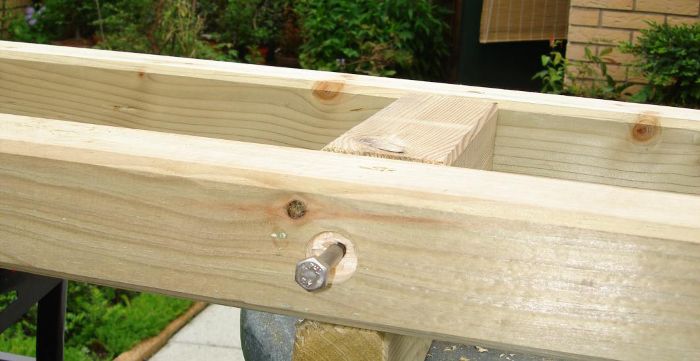
- Sink the holes with a 22mm drill – to hide the bolt heads.
- Drill through the beams with an 8mm drill – do not drill the short pieces; it’s unnecessary.
- Use 100mm bolts for all the 65mm square wood.
- Tap the bolts through the beams with the hammer into ends of the 20cm cross beams. Then use the wrench to screw the pieces together.
The centre support does not need to be exactly in the middle – but the centre legs do eventually need to be exactly in the middle. This means you need to be careful with the bolt placement because when the legs are attached they should be exactly in the middle and the bolts will cross very close to each other – one horizontal and one vertical.
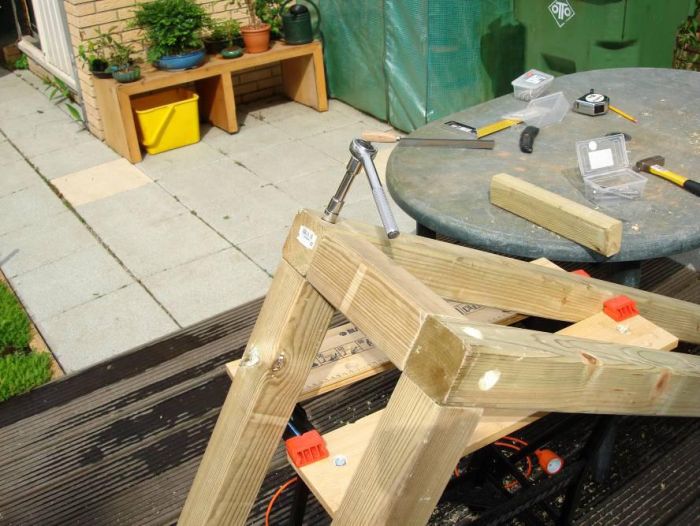
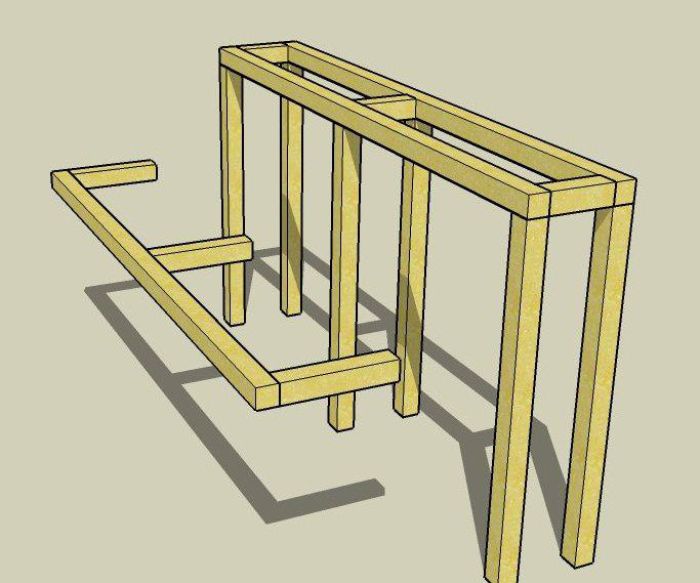
2. Attach the 6 long legs (do not tighten the bolts fully – the legs need to be able to turn to allow the drilling of some holes later...
The legs go exactly in the corners and exactly in the middle. The photo also shows how the ends of the top frame element appear after assembly.
Note: The holes need to be offset at the corners since there are two bolts which essentially cross each other at 90 degrees – one simply needs to be closer to the end of the beam than the other and then there’s no problem.
Complete all the long legs the same way. Use the workmate to hold the frame during assembly. Do not fully tighten the bolts yet…
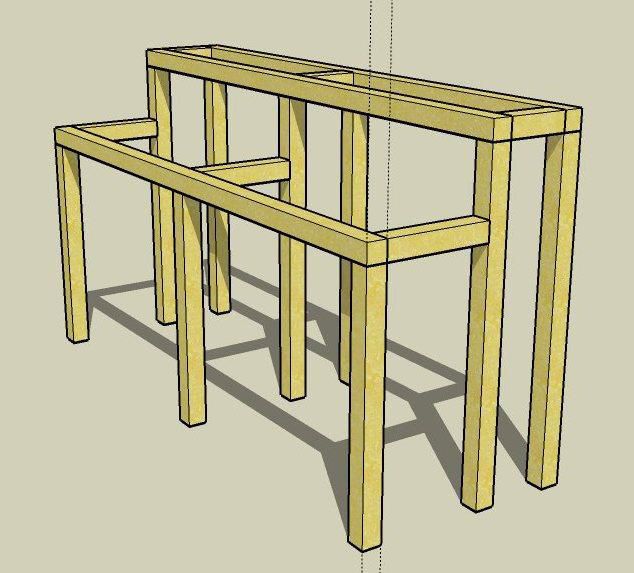
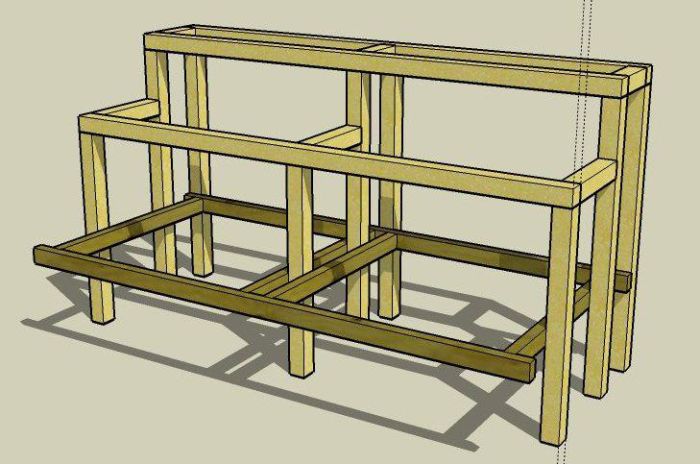
3. Assemble the second shelf from the remaining 208cm beam and 3 x 35cm supports.
- As with the high shelf – be wary of the corners when drilling the bolt holes because again, there are horizontal and vertical crossing bolts, so they must be offset by 1.5cm
- Attach the third horizontal support exactly in the middle of the long beam, otherwise it won’t align with the legs on the tall frame.
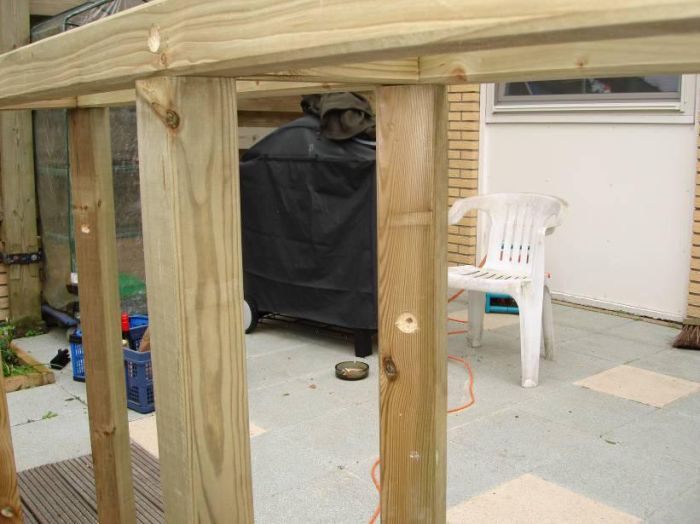
- Using one of the short front legs (82cm), mark out on the back side of the front legs where a sink hole must be drilled. The hole will be used to attach the second level to the long legs. Theoretically the position of this hole is the length of the front leg plus half the width of the support beam which will be on top of the leg (82cm + half of 6.5cm from the bottom of the front leg).
- Twist the front legs (the reason the legs were not tightened earlier) and drill through all three front long legs from the back.
4. Attach the 82cm legs to the shelf

- Attach the front 3 short legs under the middle frame. Ensure that the centre leg is exactly in the middle of the beam. The beam goes on top of the legs.
- You have created an inverted “L” shape – which is unstable and probably needs to be held in the workmate to attach the legs. Again you have bolts crossing each other at 90degree in the corners and in the middle and will need to be offset. The middle leg and middle support must be EXACTLY in the middle of the beam – otherwise they won’t align with the legs on the taller frame.
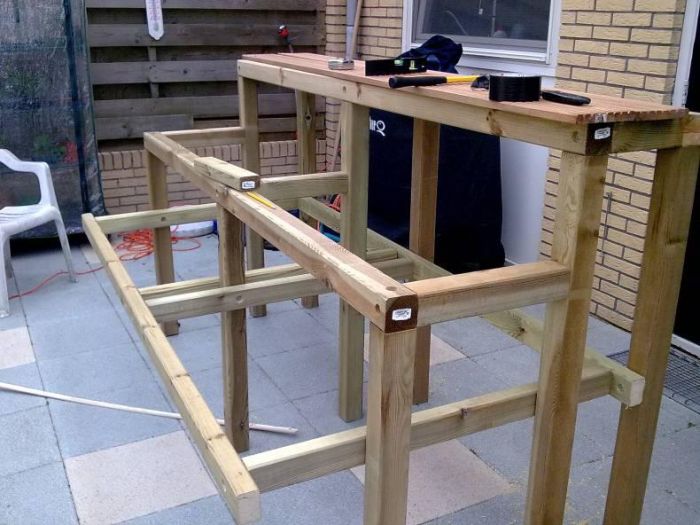
5. Attach the short front assembly to the front long legs using the holes previously drilled through the long legs. Tighten the front legs up to the top frame now. The main frame is now complete.
6. Go inside when it rains…
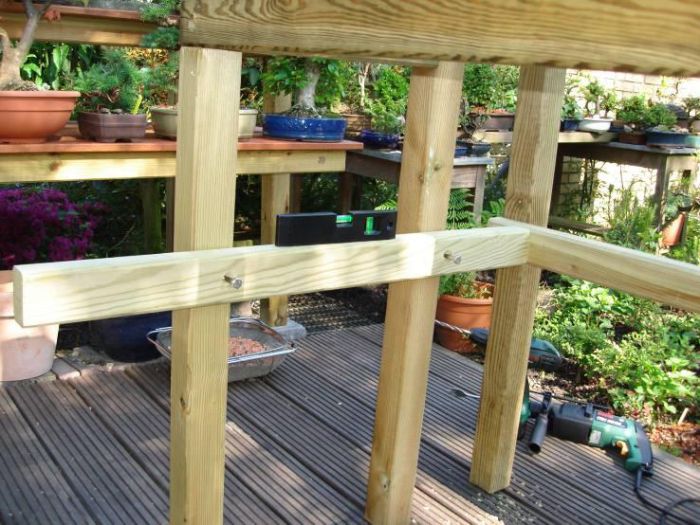
- Measure a point on the back long legs 50cm off the ground (the design above shows this as somewhat lower – my actual bench has it at 50cm).
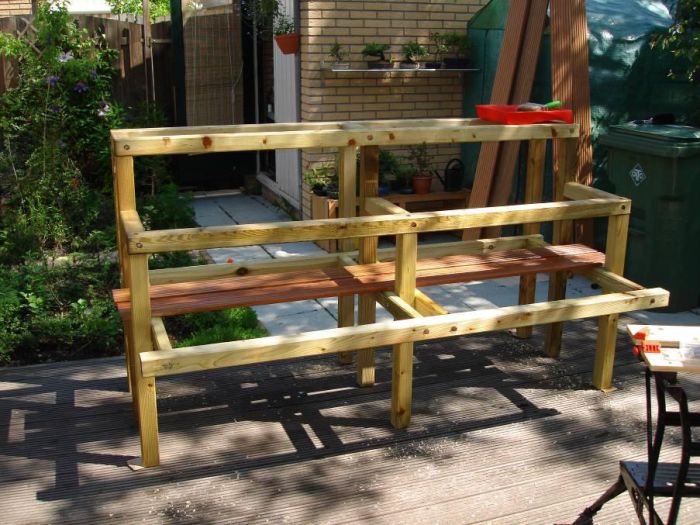
- Attach the back support beam (208cm x 65mmx 48mm) here. The photo below shows the back beam attached AND the first front to back support.
- Use the shorter bolts now because the wood is not as thick. Get the main frame level (use cardboard paper under the legs etc ) and then attach the back support beam to the left back leg – clamp the beam into place (level) and bolt in the right leg – then bolt in the middle back leg to the beam. We go through the beam INTO the leg this time.
7. Attach the 4 front to back supports (89cm) on the side of the legs. They need to be perfectly level.
8. Finally attach the front beam – ensure level.
- The frame is now complete.
- Tighten ALL the bolts.
9. Start screwing the decking onto the frame. Add these two first and paint them with wood oil (later they are much harder to get to). Paint whole frame now with wood oil and leave to dry.
10. Add the other shelves
- three on top – no gap between,
11. Try it out.

The result, the bench in my Bonsai garden.
If you make this bench please send me an email with some photos. Additionally if you need help please feel free to contact me: jeremy_norbury (at) hotmail.com. The whole design was created in Google Sketchup – the source is available here.