Making Bonsai pots is a complex process which requires a lot of knowhow, experience and artistry.
To appreciate the work of a Bonsai potter but also in order to know what to expect when you want to try working with clay yourself, the following documentation will give you an idea.
Making an Oval blue bag-shape pot and a semi-cascade pot
The creation of a glazed and an unglazed pot is shown below, from the first work steps to the complete, planted pot.

The pot in use. Old, large Pinus mugo semi-cascade. Photograph by Klaus Nadler.

How these two pots were created, step by step:

Left: Large slabs of clay have been prepared and the bottom of the pot has been shaped. The pots' walls are constructed from clay slabs, right: The basic shape of the pot has been modelled and the first layer of the upper rim added.


Left: The walls have been smoothed and the still wet and soft pot is turned upside down with some props on the inside, right: The second layer of the rim is applied.


Left: A coil of clay is attached to form the upper rim of the pot, right: The third layer of the rim is attached and shaped and the pot is smoothed. Drainage and fixation holes are added and the feet attached.


Left: The feet and drainage and fixation holes have been are added, right: The pot seen from a different angle.


Left: The surface structure is created, right: The pot seen from a different angle.

Left: After bisque firing, manganese ore has been applied for dark contrasting effects, right: Some details are smoothed


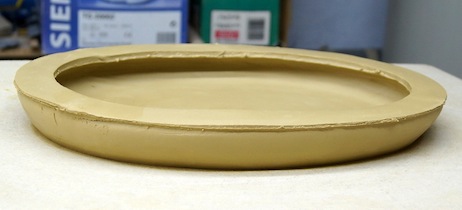
Left: Fired for the second time: semi-cascade pot ready for use, right: Glazed and fired: the pot is ready.
Bonsai pottery step by step
All the necessary work steps and devices for making an oval bonsai pot with a rim are shown in detail in the photographs below.

A set of pottery tools.

A paper pattern is created for the bottom shape and feet of a pot.

The clay slab for the bottom of the pot is prepared.

The paper pattern is applied.

The bottom, the walls, the rim and the feet are cut from the clay slab.

The bottom and the wall parts are prepared for joining them together.

Dry clay is pulverized.

The pulverized dry clay is mixed with water and stirred to make slurry.

The slurry is brushed onto the roughened outer limits of the bottom.

Now the walls are mounted.

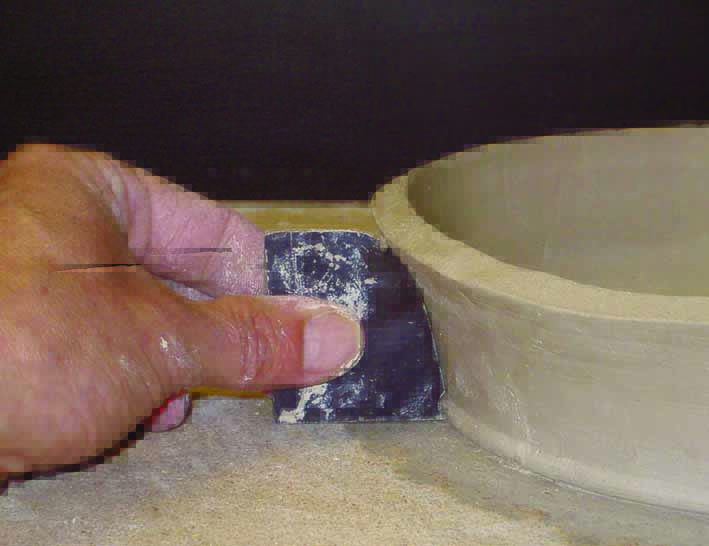
The junctions are smoothed with a spatula.

On the inside a clay coil is pressed into the pot to stabilize the junctions between bottom and walls.

The inside of the pot is smoothed with a spatula.

A piece of wood is sawed off at the desired angle.

The little wood block serves as a gauge for the walls.

A finer gauge is sawed from thin plywood. It serves for constructing an even profile of the walls.

The wood block is used to press a fitted clay band to the pot.
The finer gauge is used to shape the walls and the band.

The top of the wall is cut at an even hight.

The rim is attached.

The rim junction is smoothed on the inside.

The pot is turned upside down and additional clay is modelled onto the junction between the wall and rim.

The sharp edges of the rim are rounded.
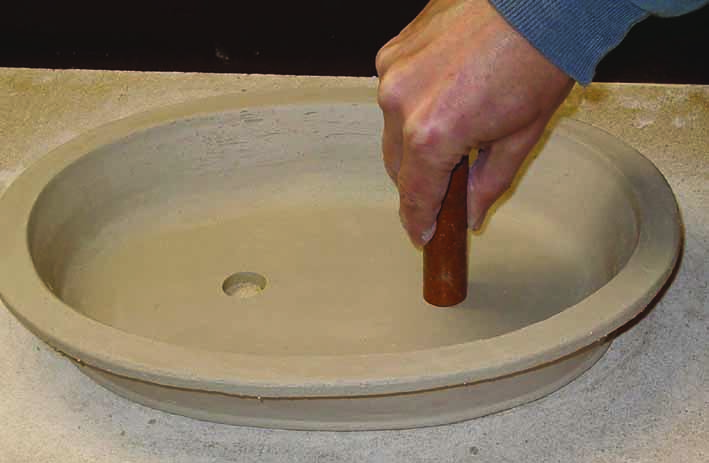
The drainage holes are pierced into the bottom of the pot.

Fixation holes are drilled.

The surface of the clay is smoothed with a moist sponge.

The feet are attached with the help of slurry.

Four little clay cubes are attached to keep the bottom from sagging during the drying process. The pot must dry slowly because otherwise the pot will break.

The pot has been bisque-fired after drying. Now the glaze is applied. The color will change completely during the glaze-firing process.

Glaze applied.

The pot is ready after glaze-firing.

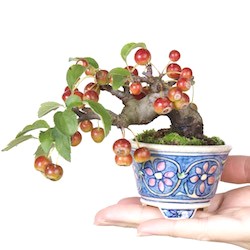
A red hawthorn was planted into the pot.
Photos of the kiln
For firing the created pots after drying, a special pottery kiln is required. There are many different kiln types, shapes, sizes and firing methods, like electric kilns, gas kilns and woodfired kilns.
Generally the bonsai tree pots are fired twice. The first firing process, called bisque firing, takes place at approximately 800 – 900° C. Afterwards a glaze can be applied, if desired. The second firing process (stone ware firing) must go up to 1200 – 1300° C in order to achieve perfectly frost-resistant pots. In the following pictures you see Erwin Grzesinski's electric kiln.

Erwin's kiln in a cellar room. Regard the electric power line and the exhaust pipe.

The kiln's controls.

The bottom layer of pots and glaze tests loaded into the kiln for firing.

A fireclay board has been added and the middle layer of pots etc. is placed upon it inside the kiln.

A second fireclay board has been set in and the top layer of pots is placed on it. The inside dimensions of the kiln are 21" by 21" (54cm x 54cm).
Before and after glazing, three examples
Glazes are an interesting subject within Bonsai pottery. Newcomers will use ready-made glazes while professionals prefer to develop glazes of their own. At the beginning it might be astonishing that the colour of the applied glaze has hardly any resemblance to the glaze colour after firing. The glaze must be appropriate for the firing temperature for achieving the expected results. A good knowledge of chemical processes is useful.
The following photographs show a few examples of glazed pots before and after glaze firing.


Documented by Erwin Grzesinski and written by Heike van Gunst. Erwin Grzesinski, born in 1954, studied architecture and in his professional life restored churches and - among other things - worked in the building materials business. Besides artistic hobbies like carving soap stone figurines, he has been making Bonsai since 1995 and Bonsai ceramics and accent pots since 1996. Over the years pottery became more prominent and meanwhile Erwin has a considerable number of customers among Bonsai enthusiasts and artists from Germany and abroad. As he mostly works on order and can't produce great numbers of pots because of limited capacities, his pots are generally not found at Bonsai traders (website). Heike van Gunst (from Hamburg, Germany) has been growing Bonsai for more than 30 years. She has gained manifold skills in training and caring for diverse species and has developed a passion for Bonsai pots and display. Writing and translating Bonsai articles and Bonsai book translations are her special subject.